Filmolino SlideScanner
The Filmolino SlideScanner is a device that makes it easy to scan slides in magazines fully automated using a modified slide projector and a digital camera. It controls the slide projector and a digital camera using a cable release or an infrared remote control (Nikon, Canon, Pentax, Sony, Olympus, Minolta). New cable releases and IR controls can easyily be added to the software.
Thanks to the M5Stack Fire from M5Stack using a ESP-32 core together with 16M Flash, 8M PSRAM and a built in 3.7V/500mAh Lithium battery it is also possible to use the device without a power supply and remote control the SlideScanner through a web interface over WiFi. The scanner has it’s own access point to which you can connect.
The Filmolino SlideScanner is completely open source, so you can easy build your own!


Examples
Fujichrome RD ISO 100 slide film. Photo from 1994, building site in Berlin. © by Thomas Gade
Scanning
Pentax K-70 with a APS-C sensor with 24 MP. Shot with pixel shift, to eliminate the disadvantages of the Bayer matrix. With Pentax, this does not increase the number of pixels, but the detail resolution is better.
Objective
Tamron SP 2,8 / 90mm macro lens.
Development
DxO PhotoLab, level adjustments in Photoshop, optimisation of a layer with Topaz Photo Ai.
Build your own!
You can find all project files on https://github.com/filmolino/SlideScanner
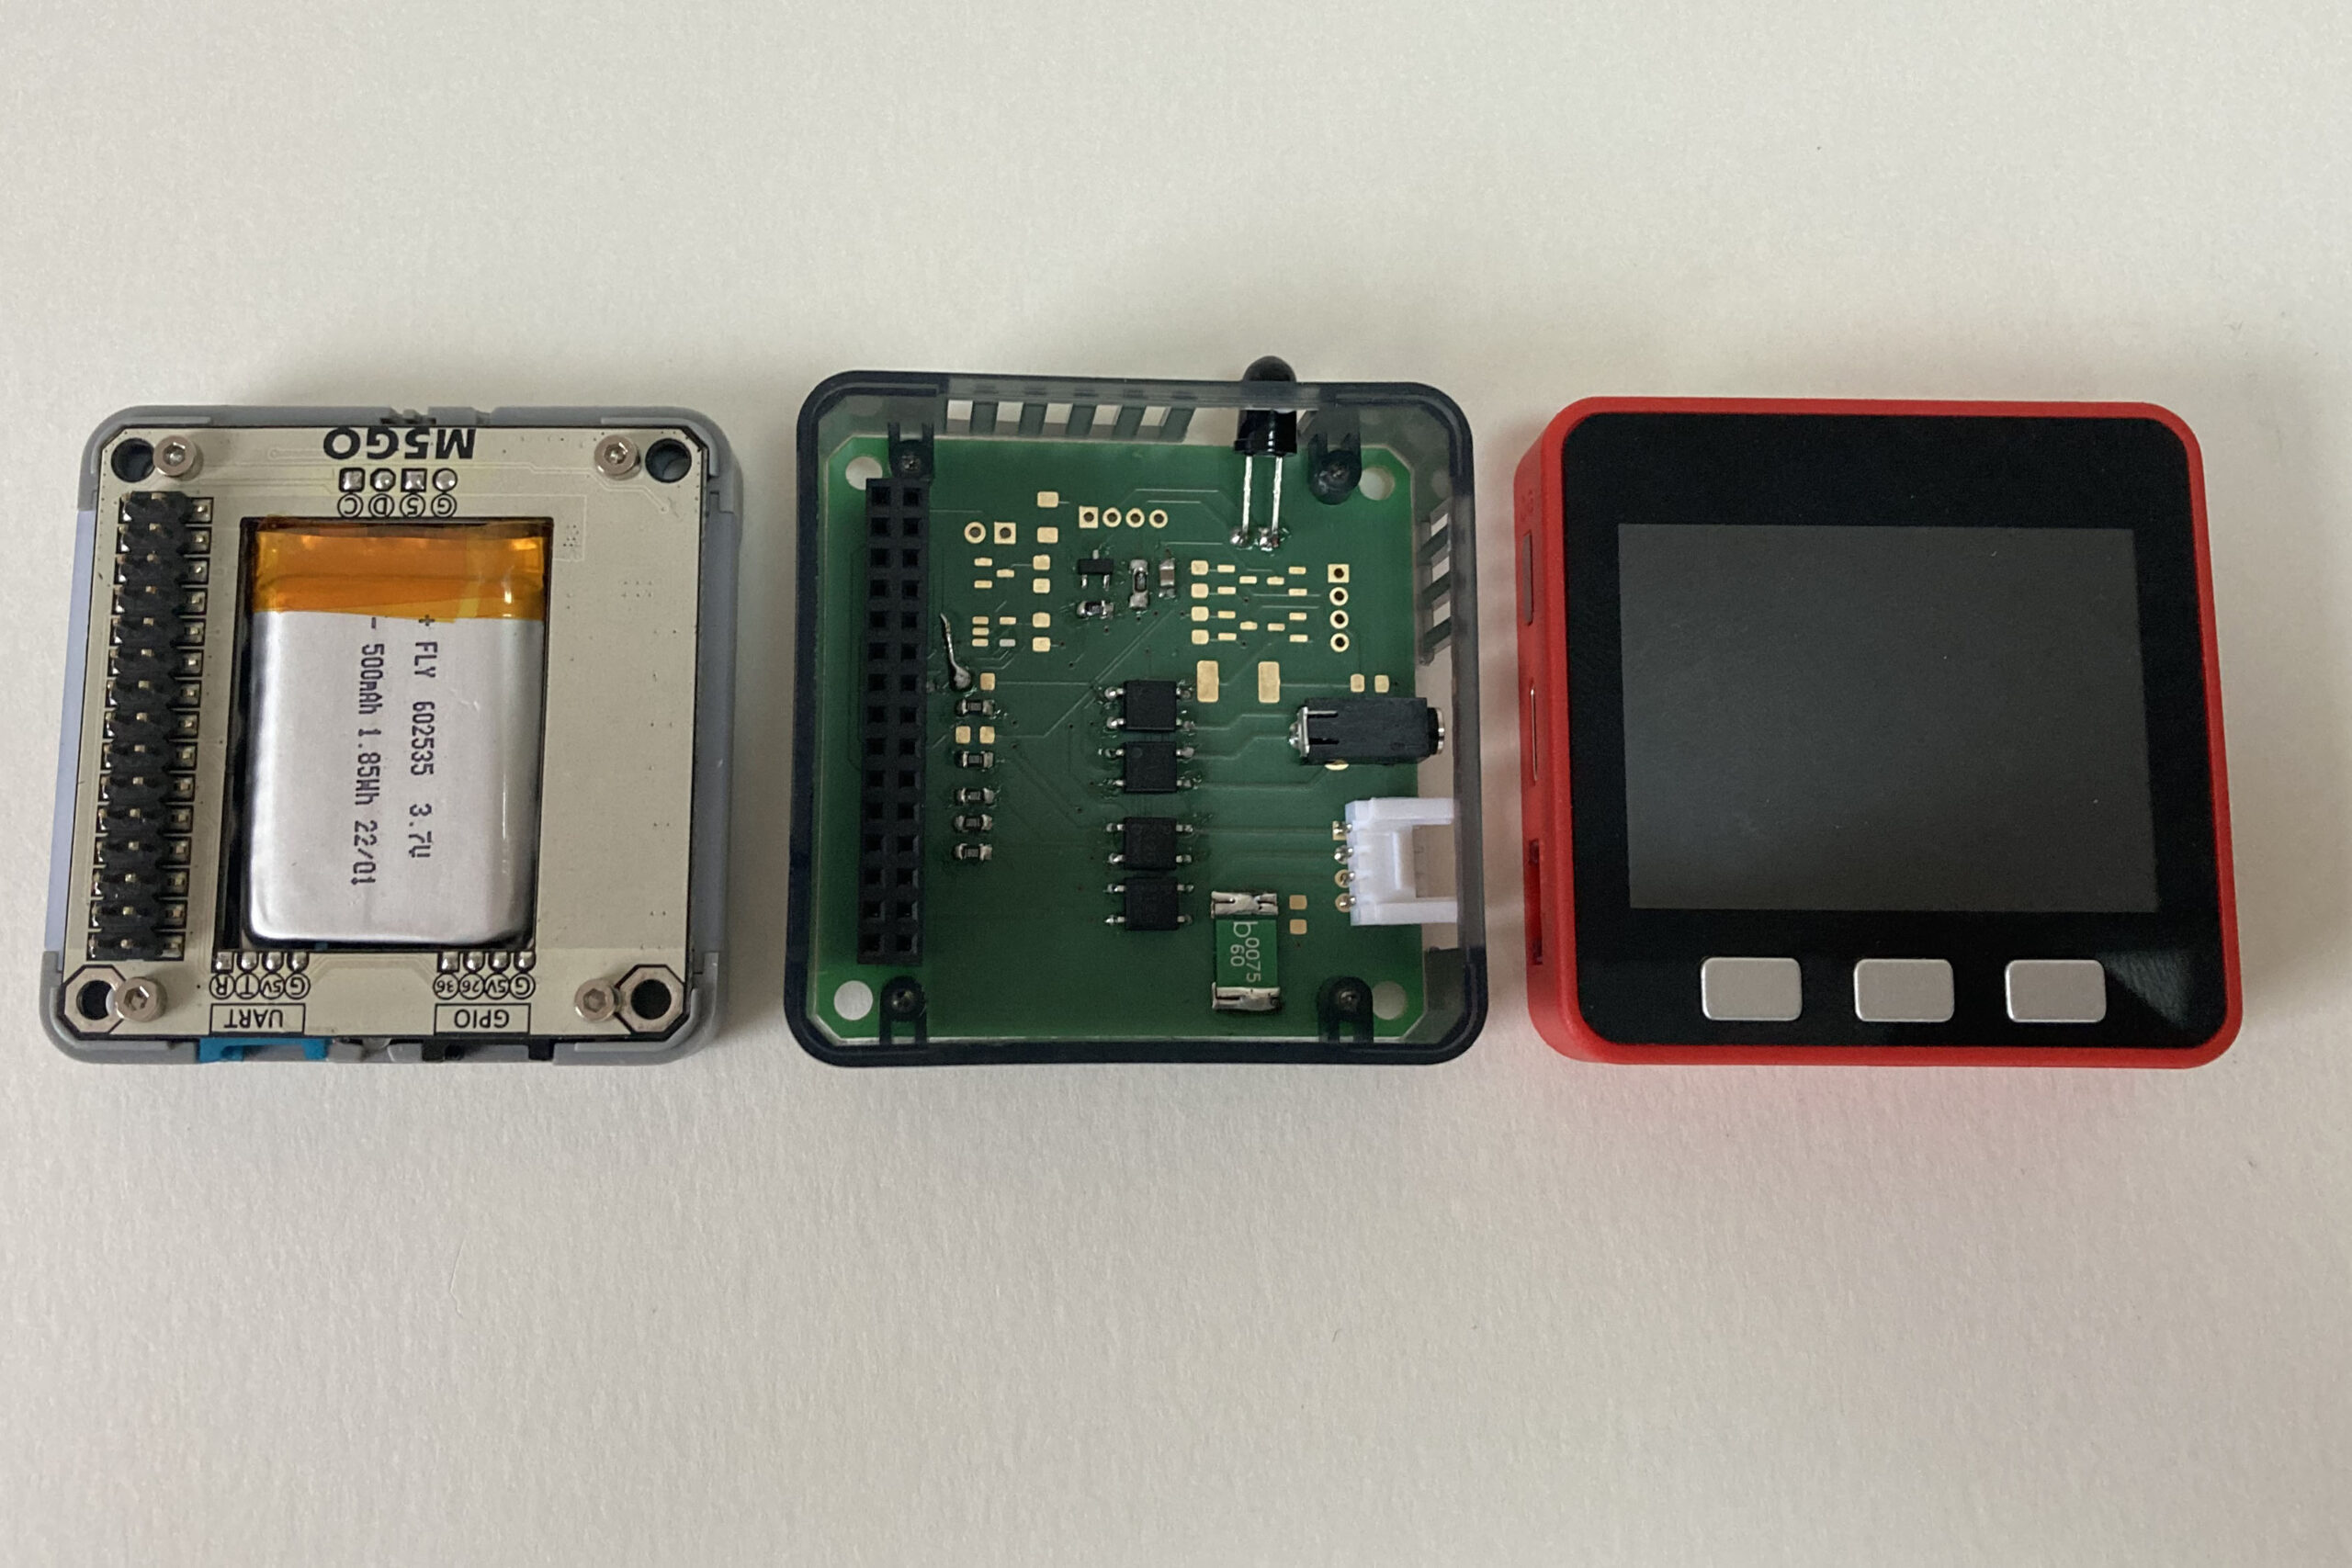
Hardware
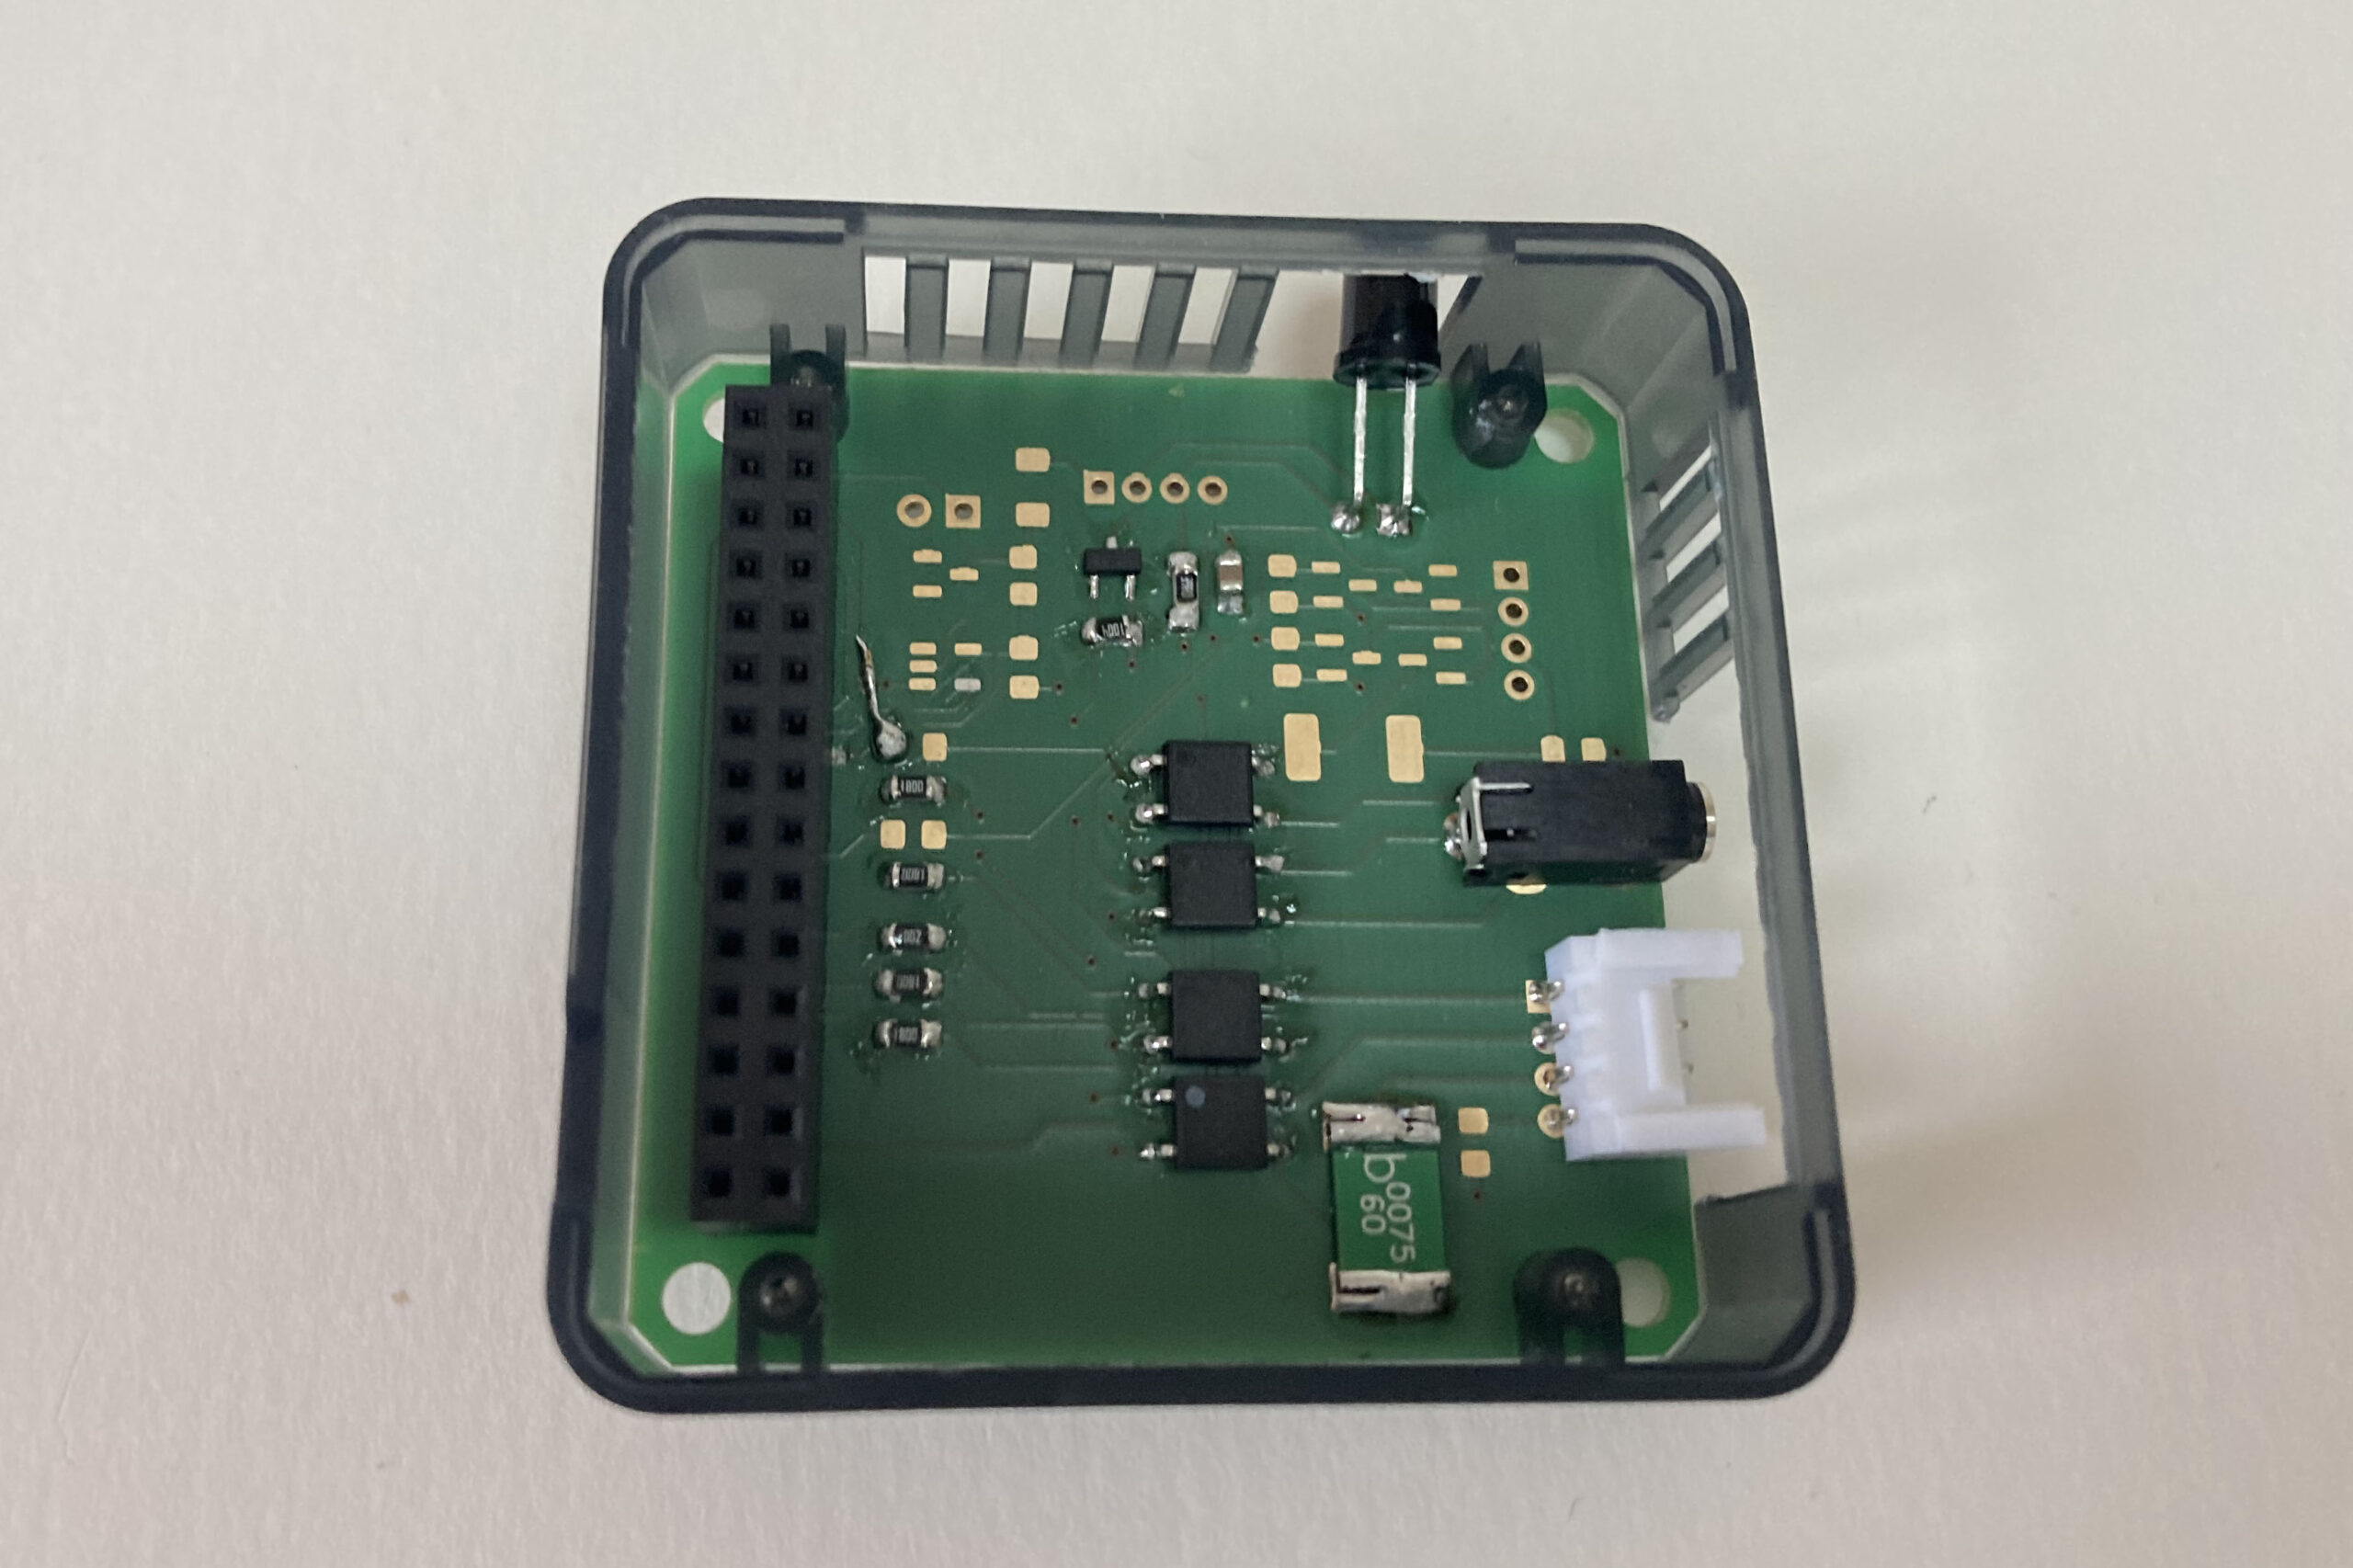
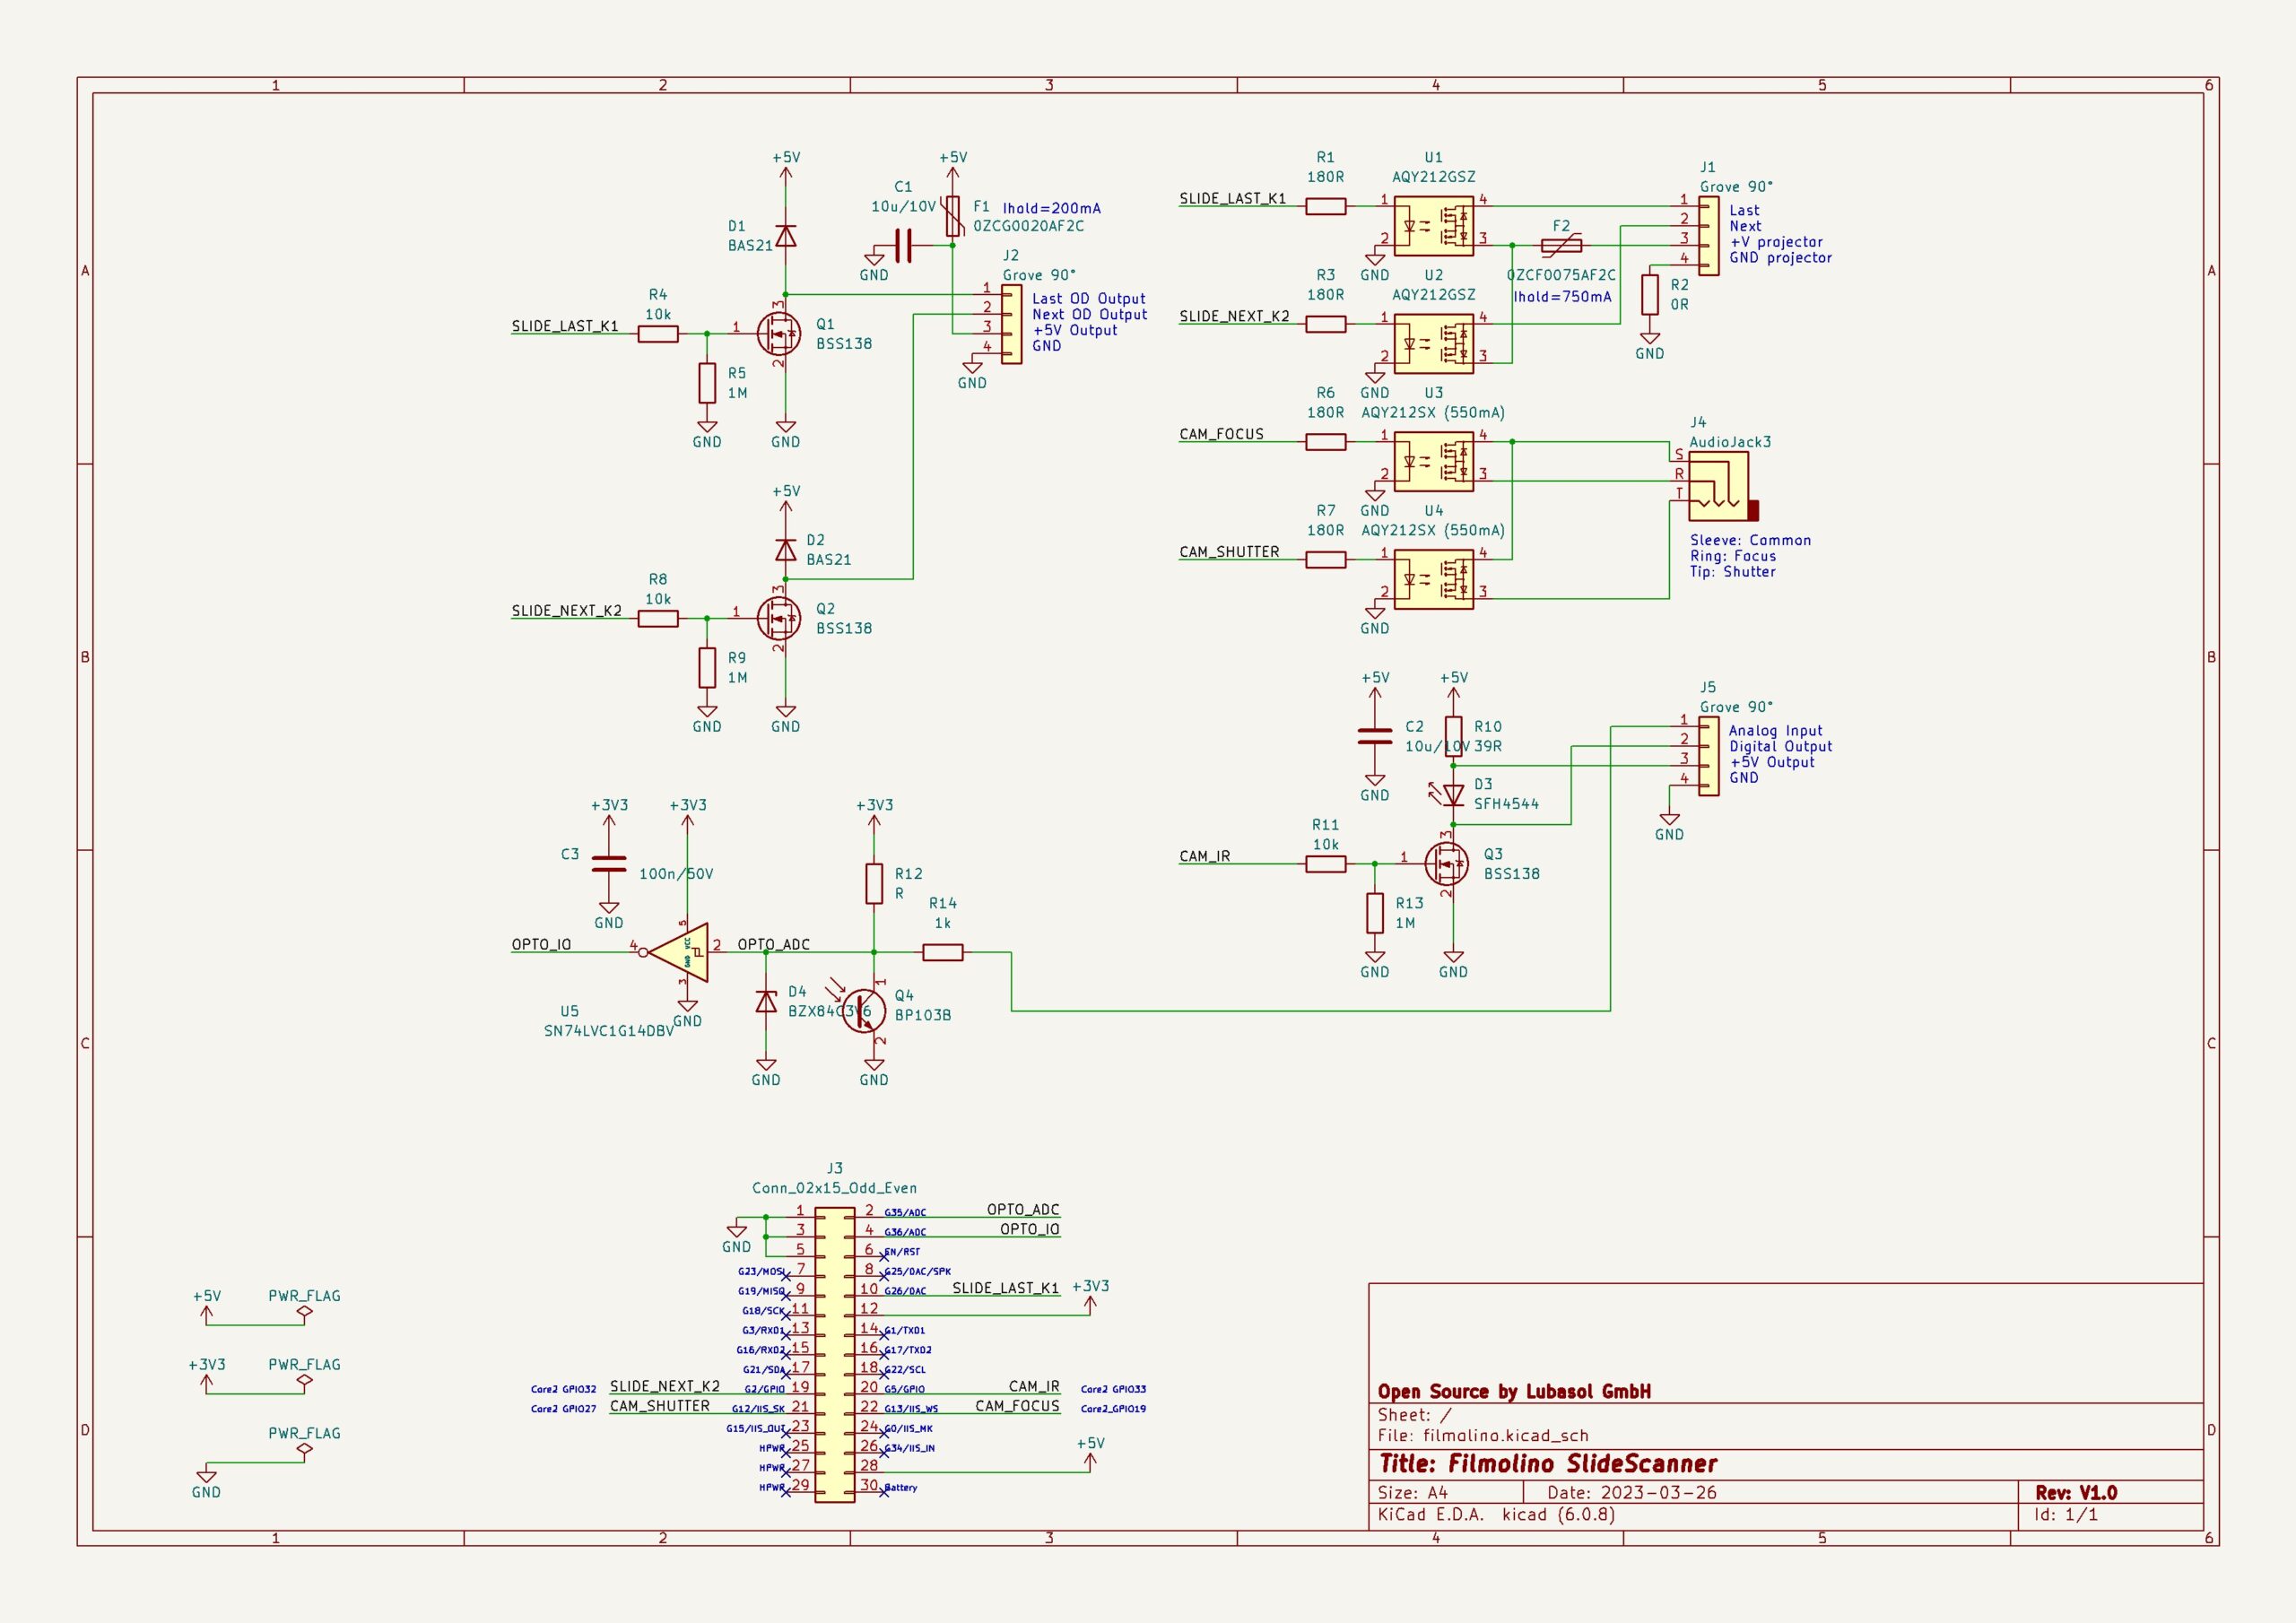
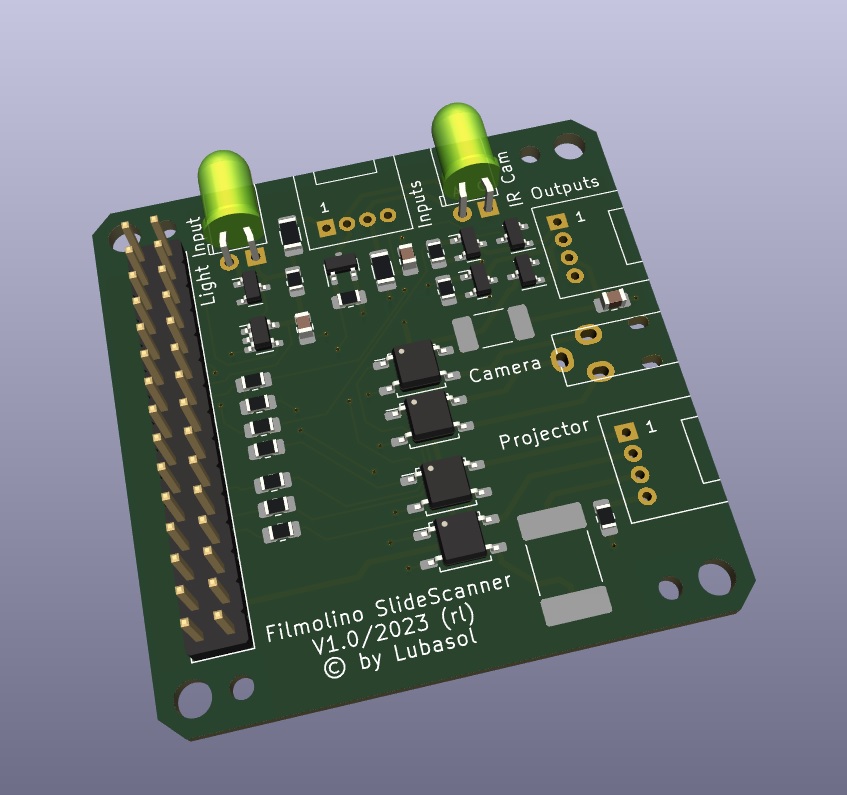
The Filmolino SlideScanner consists of a M5Stack Fire and a special electronic module for the M5Stack Fire and it is designed in KiCAD. The double sided pcb can easily be soldered by hand. The components are easily available from the usual distributors. The KiCAD project supports more functions then used for the slide scanner. So you only need to assemble the following components:
Designator | Part
C2 | capacitor 10u/10V, 0805, SMD
D3 | SFH4544, infrared diode, THT
F2 | 0ZCF0075AF2C, resetable fuse 750 mA, SMD
J2 | Grove 90° connector THT
J3 | M5Stack 30 pin connector THT
J4 | 3 pin 2.5mm audio jack Lumberg THT
Q3 | BSS138, MOSFET N-CH, SMD
R1,R3,R6,R7 | resistor 180R, 0805, SMD
R10 | resistor 39R, 1206, SMD
R11 | resistor 10k, 0805, SMD
R13 | resistor 1M, 0805, SMD
U1,U2 | AQY212GSZ, solid state relay, SMD
U3,U4 | AQY212SX, solid state relay, SMD
Software
The software is based on Arduino and build using Platform.io and Visual Studio Code.
Open the project
- Install Visual Studio Code
- Install the PlatformIO Extension
- Open the project in Visual Studio Code
- Now PlatformIO installs the needed tools automatically
Upload
We need to build and upload the filesystem and the firmware.
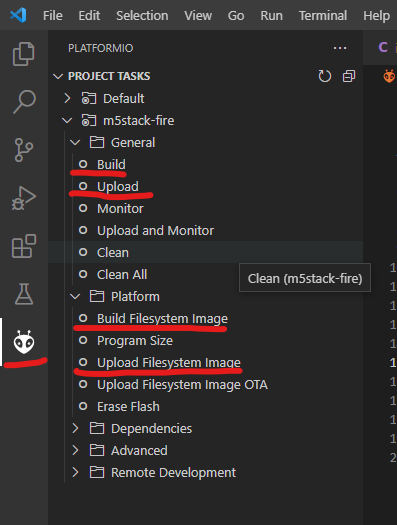
- Click on the PlatformIO icon on the left side
- Click on Build Filesystem Image
- Click on Build
- Click on Upload Filesystem Image
- Click on Upload
Now your Filmolino SlideScanner is ready to scan your slides!
Modifying the Slide Projector
You need to modify a slide projector so that you can use it for scanning.
Detailed descriptions and instructions for modifying the slide projector from Thomas Gade can be found here (at the moment in german only):
Dias scannen oder abfotografieren
Modifikation Projektor
Filmolino Slide Scanner
Setup
Powering the Scanner
There are different ways to power the device:
- Use the built in battery
- Connect a USB-C power supply to the usb connector on the left side
To turn ON the scanner push the red button on the left side once.
To turn it OFF push the red button on the left side twice.
Charging the battery
Connect a USB-C power supply to the Fire M5GO CHG base an put the fire on top of it. The battery is fully charged when the light turns to green.
Connect the camera
You can connect your digital camera using a cable connection or infrared remote control. To control your camera using the cable release you need a shutter release cable for your camera with a 2.5 mm jack connector on the other end. You can find the right cable for your camera searching the web for *JJC Remote Control Shutter Release Cable*. They are not expensive and you should get one for about 10 EUR.
The pin assignment of the 2.5 mm jack connector is as follows:
Pin | Function
Sleeve | Common
Ring | Focus
Tip | Shutter
Slide projector cable
To connect your slide projector to the Filmolino SlideScanner you need a cable with a 4 pin Grove and a male 6 pin DIN connector. The easiest way to build this cable is to buy one of these grove cables (available in different length) and cut off one end. On the open end you can then solder the 6 pin DIN male connector as follows (you just need to connect pins 1 to 3):
Pin DIN | Grove connector PCB | Function
1 | 1 | Reverse slide transport
2 | 2 | Forward slide transport
3 | 3 | Positive DC voltage
4 | x | Not used
5 | x | Not used
6 | 4 | Not used for the SlideScanner (Negative DC voltage)
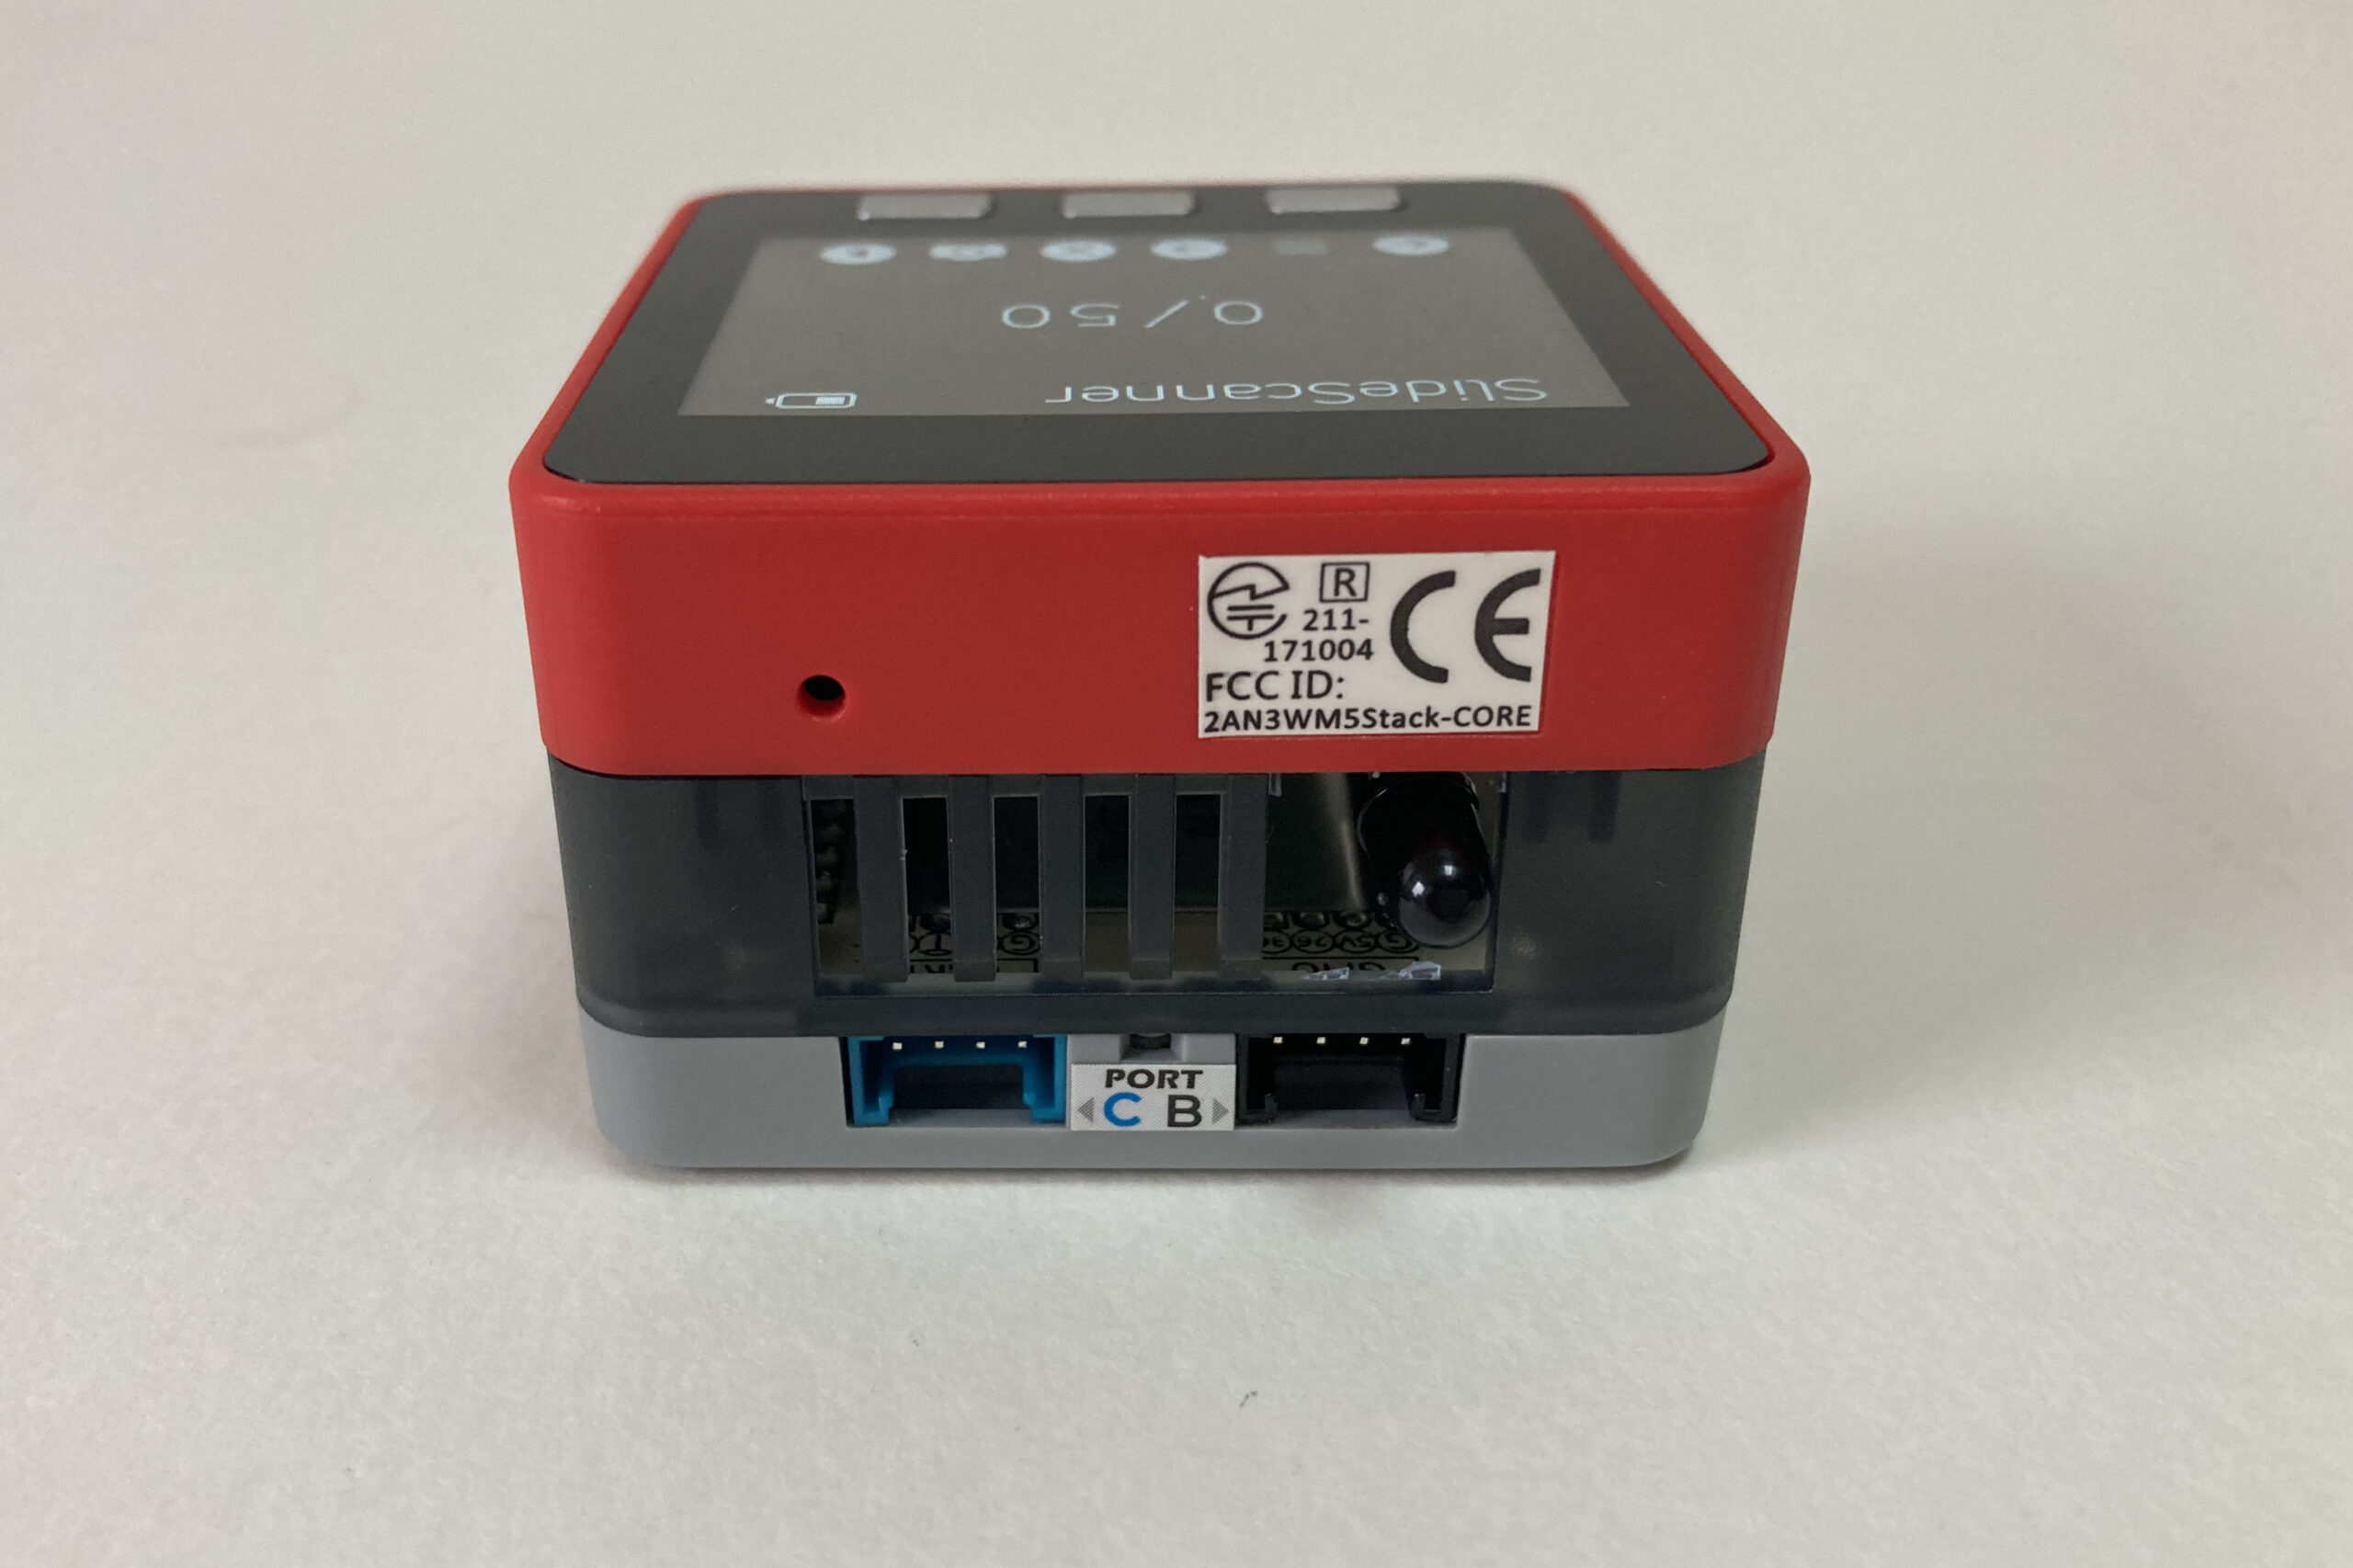
Slide projector connection
Important: Use the Tape/remote control socket and not the lap dissolve socket of the slide projector.
Connect the Grove 4 pin connector on the Filmolino SlideScanner and the 6 pin DIN connector into the *remote control socket* of your slide projector.
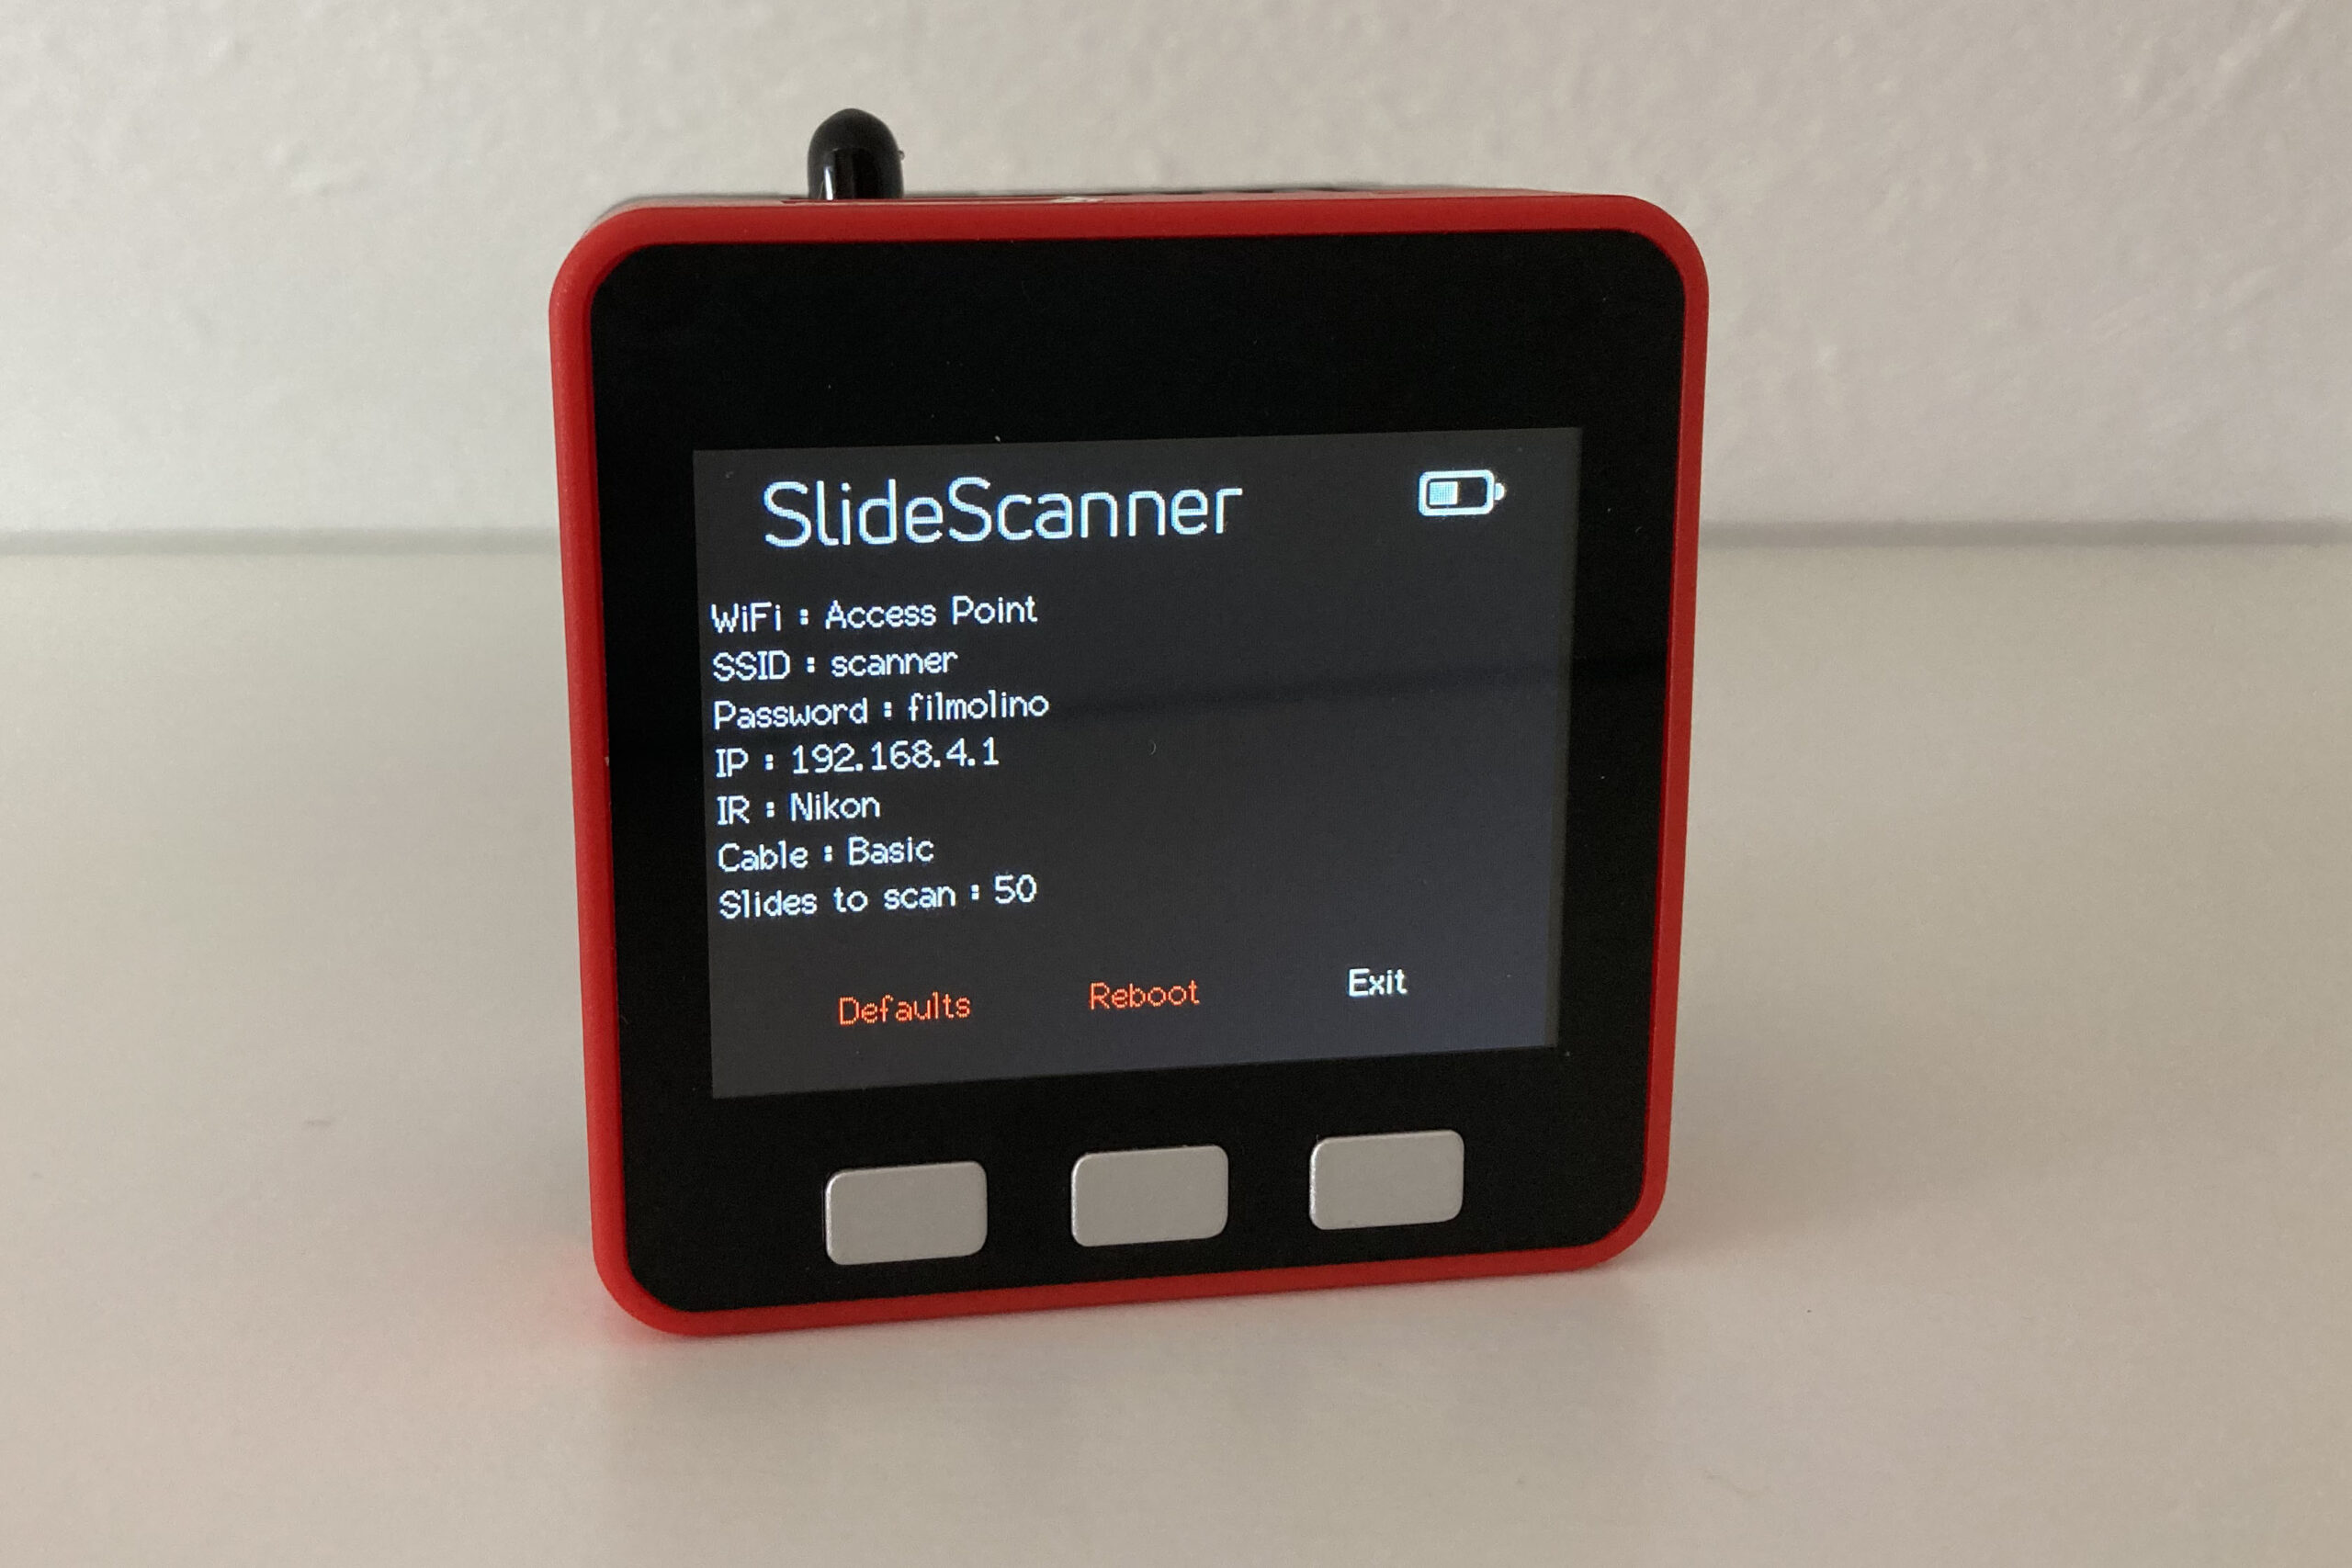
WiFi Connection
Connect to the scanner
The scanner starts its own WiFi access point:
Default WiFi credentials:
SSID = scanner
Password = filmolino
IP = 192.168.4.1
URL = filmolino.local
To see the web user interface execute the following steps:
- Connect your PC, smartphone, tablet etc. to the SlideScanner network with the SSID scanner using the password filmolino
- In your webbrowser enter filmolino.local or 192.168.4.1
- Now you should see the SlideScanner web interface
Scanner configuration
WiFi Settings
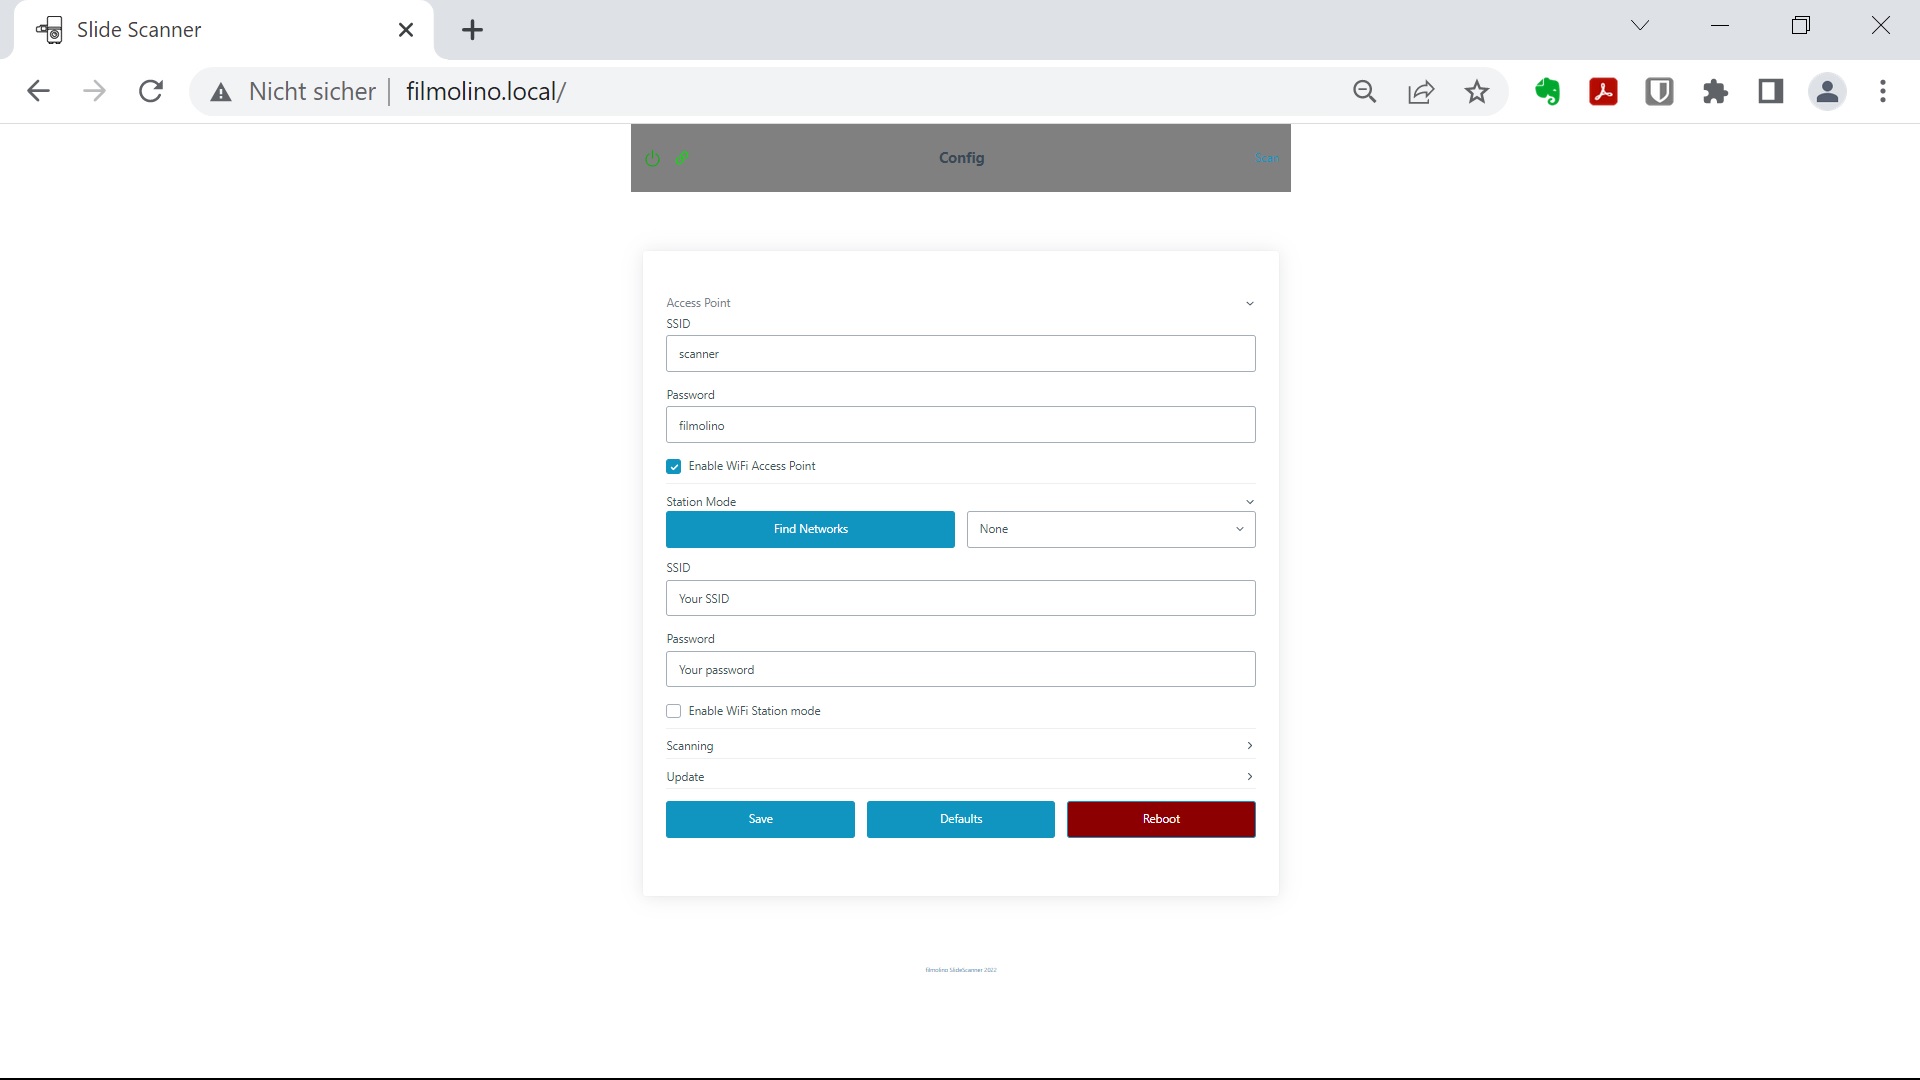
Access Point Settings
Here you can change the SSID, set your password and enable the access point.
Station Mode Settings
Here you can set the credentials for the SlideScanner to use your WiFi network.
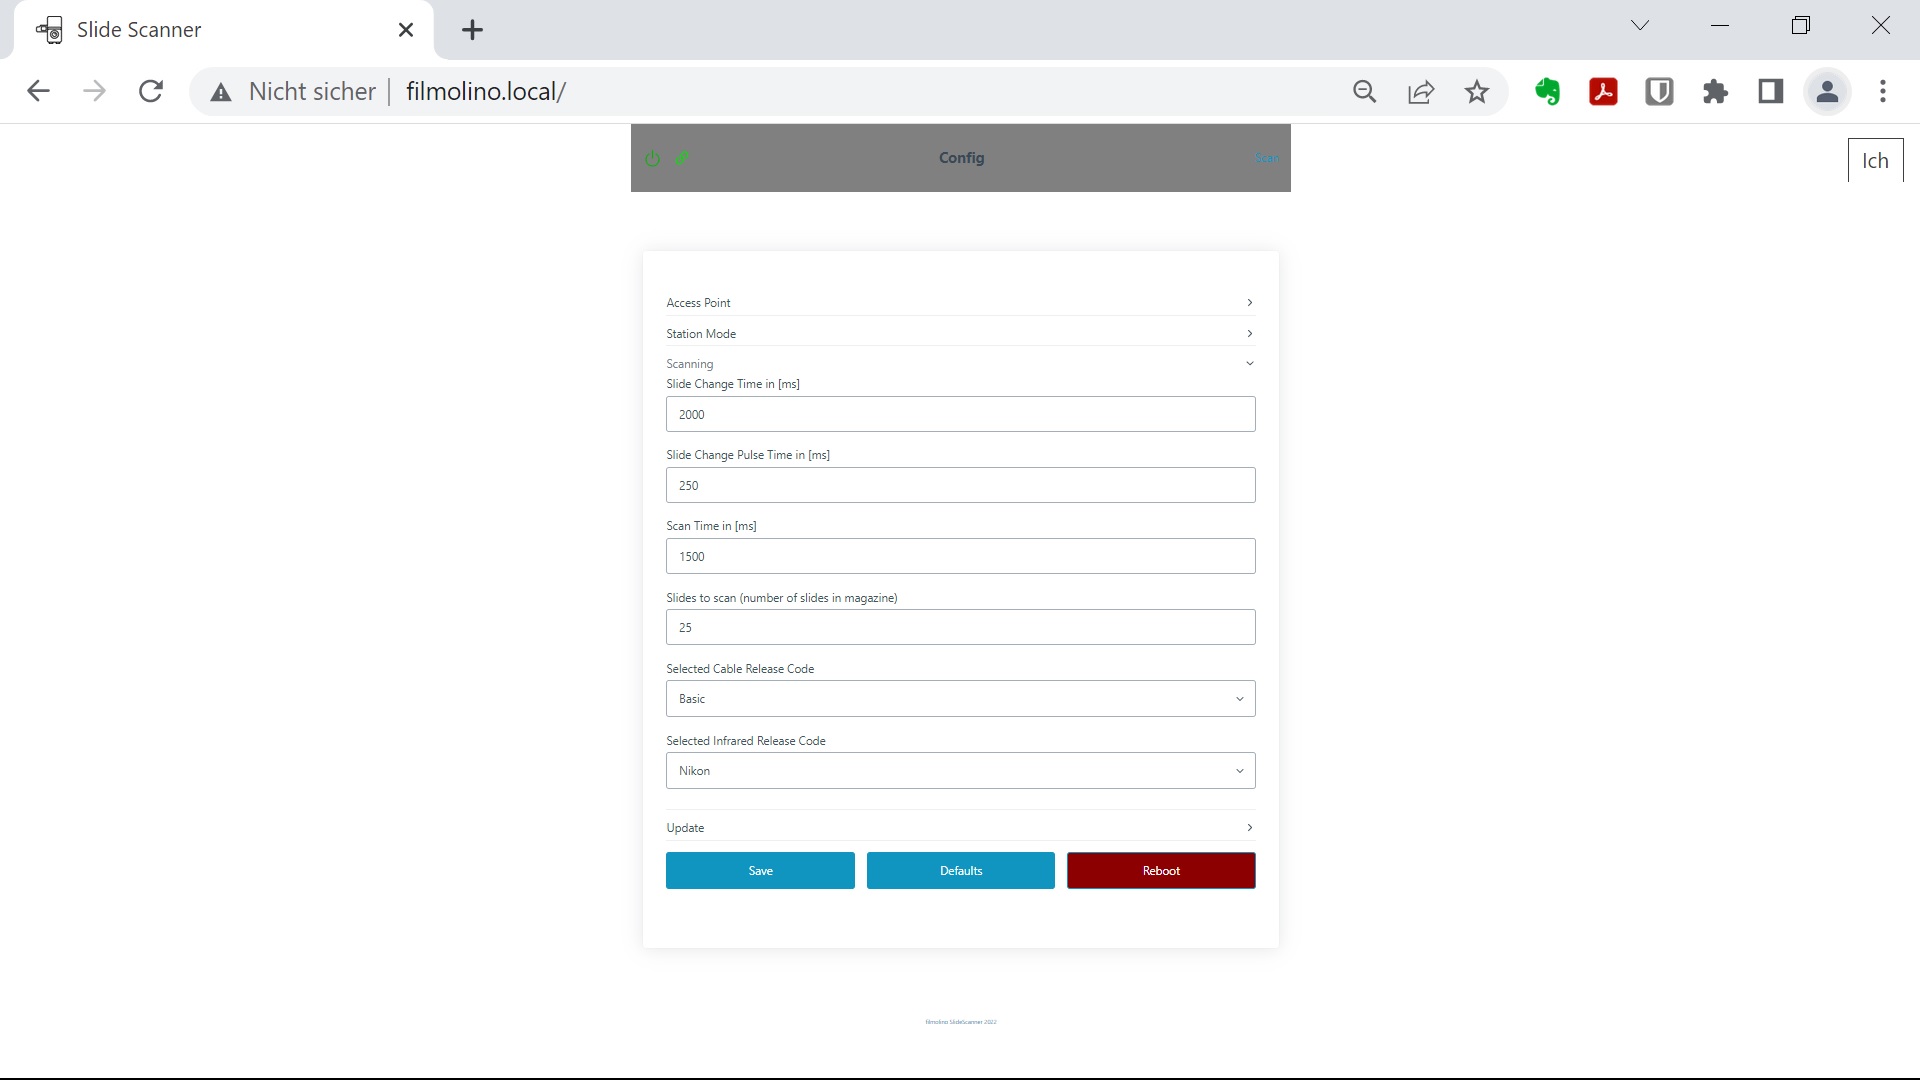
Scanning
Slide Change Time
This is the time the slide projector needs to change the slide.
Unit is milliseconds (1 second = 1000 milliseconds).
Slide Change Pulse Time
Duration of the pulse for the slide transport. During this time the slide transport contacts are closed.
Unit is milliseconds (1 second = 1000 milliseconds)
Scan Time
This is the time the digital camera needs to capture (scan) the slide.
Unit is milliseconds (1 second = 1000 milliseconds)
Number of slides in a magazine.
Selected cable release
Can be OFF or the cable release you want to use.
Can be OFF or the brand name of your digital camera.
Buttons
Update
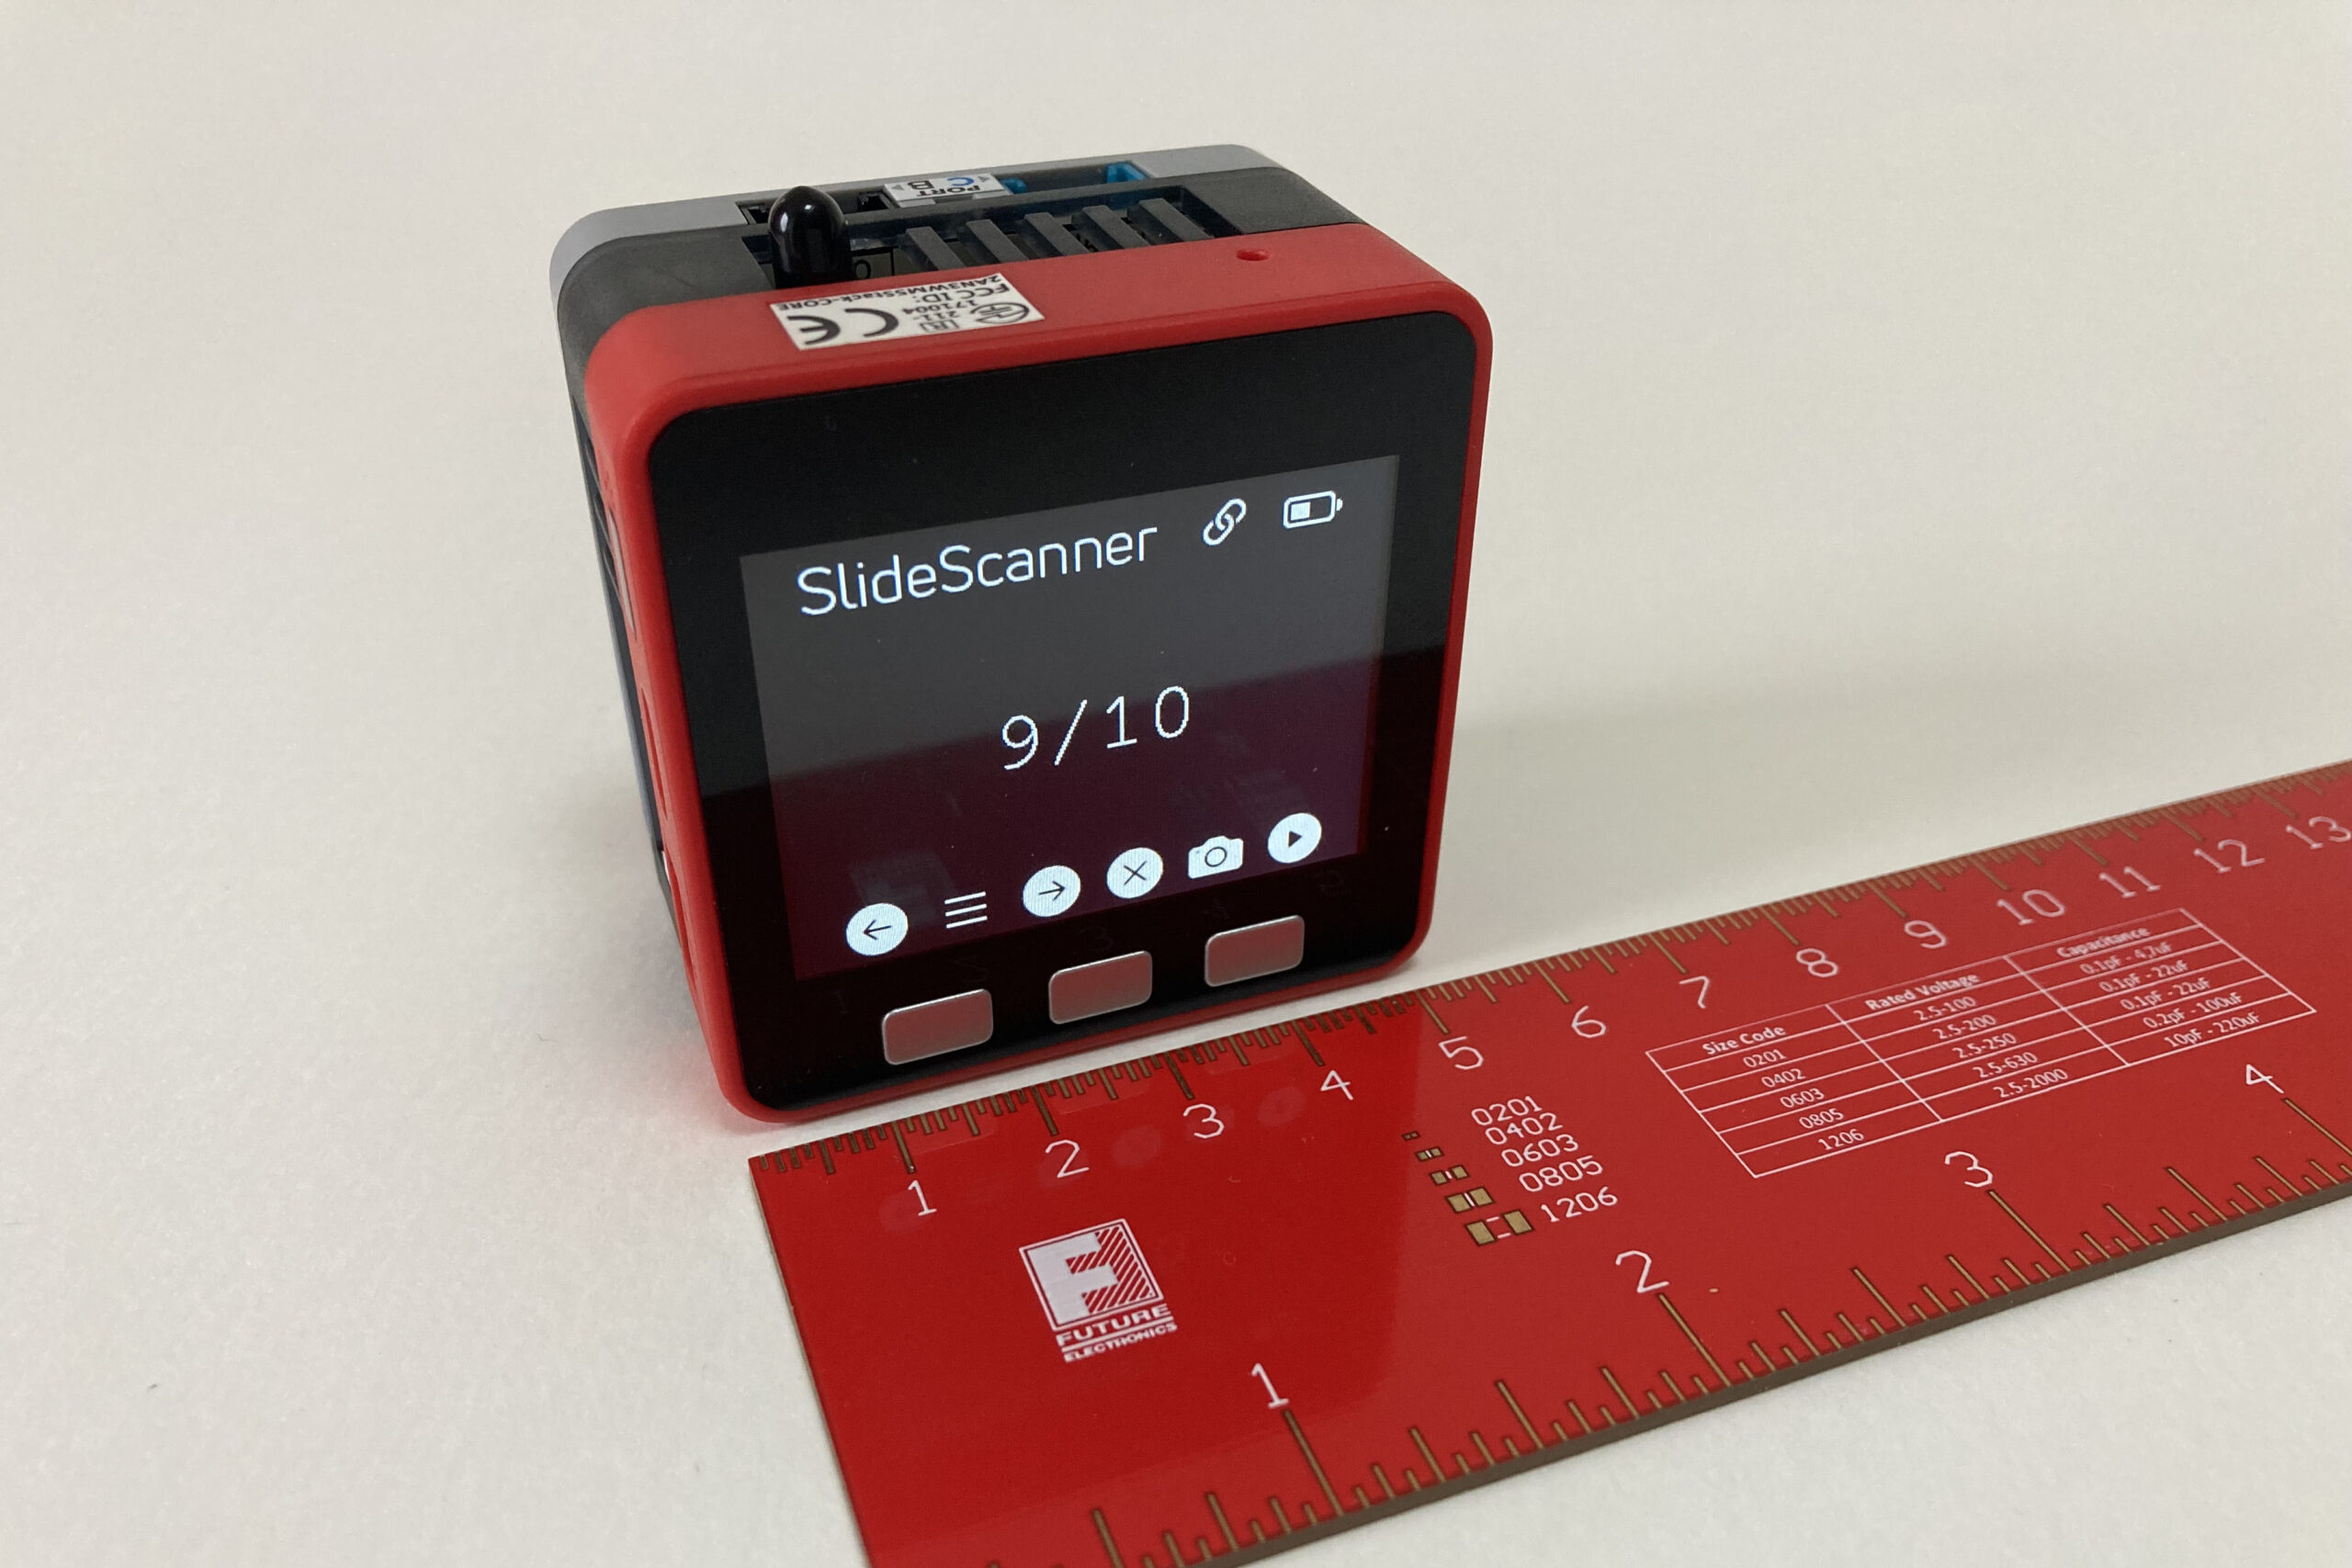
Standalone operation
The device is controlled with only three buttons. They are defined as follows:
![]()
![]()
Short press = Backward slide transport
Long press = Display info
![]()
![]()
Short press = Forward slide transport
Long press = Reset slide counter to „0“
![]()
![]()
Short press = Trigger camera (if an auto scan is active, stop it)
Long press = Start auto scan
WiFi operation
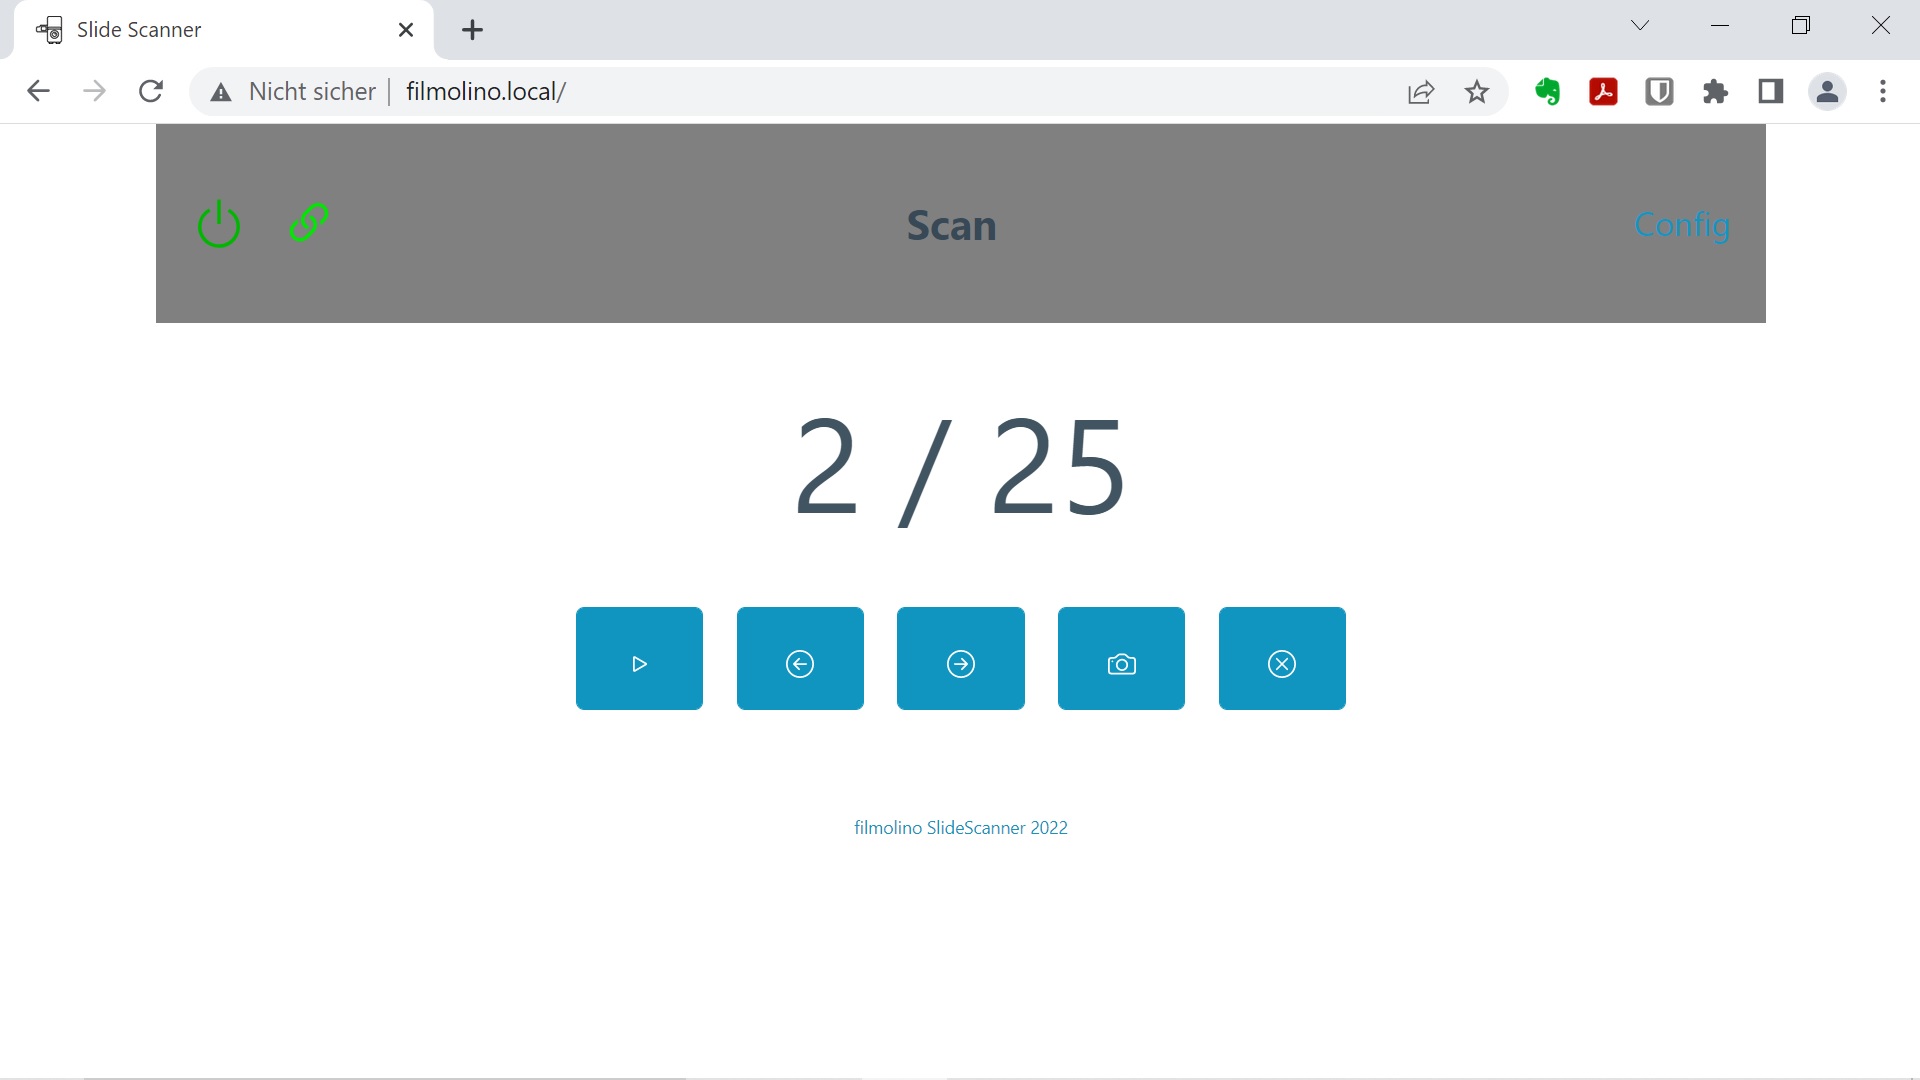
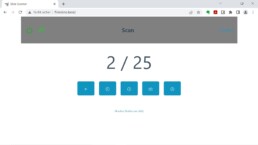
Connect to the WiFi and open the address filmolino.local or 192.168.4.1 in your webbrowser as described above. The SlideScanner is connected as long as you see the green connected sign ![]() in the top left corner.
in the top left corner.
This view shows the current slide counter and the slides in the magazine (2/25).
You can start an auto scan or manually scan slides using the five buttons below. If you want to change the current configuration click Config in the top right corner.
To change to number of slides in the current magazine you can click on the current slide counter or go to the config menu.